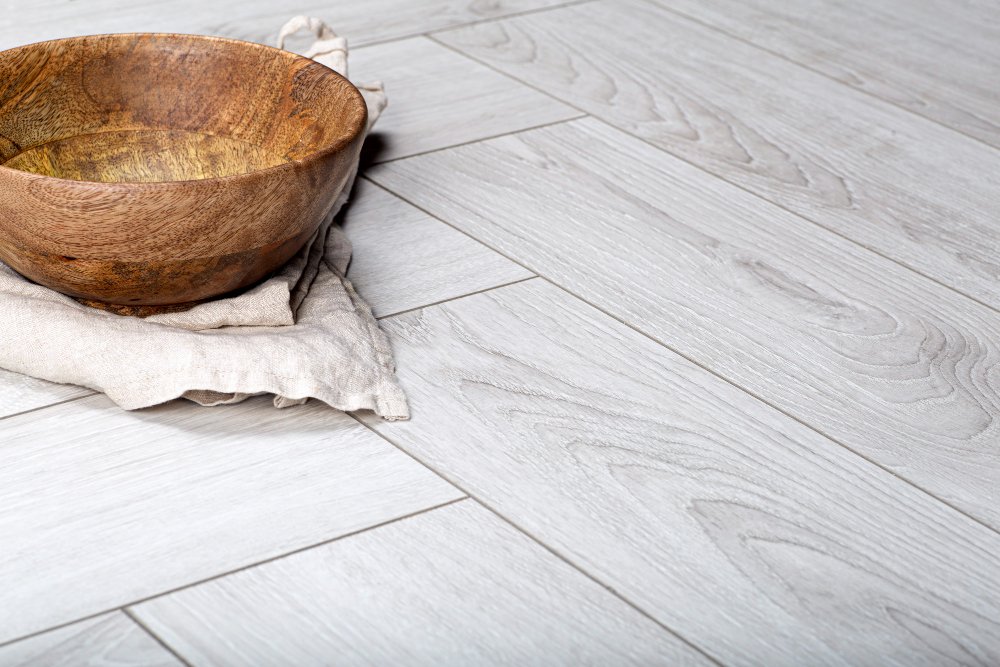
When it comes to combining performance, aesthetics, and longevity in flooring, Cortona Maxx waterproof floors offer a high-caliber solution. As a standout in the world of luxury vinyl flooring, Cortona Maxx provides the elegance of wood-look planks with the resilience of cutting-edge waterproof flooring technology.
Whether you’re tackling a full home renovation or simply upgrading a single room, the success of your project depends heavily on proper flooring installation. In this guide, we’ll walk you through the best practices and essential steps to ensure your Cortona Maxx waterproof floors are installed for maximum performance and long-term satisfaction.
Why Choose Cortona Maxx?
Before we dive into the process, it’s important to understand why Cortona Maxx has become a preferred option for contractors, designers, and homeowners:
100% waterproof core resists spills and humidity
Scratch-resistant flooring ideal for pets and heavy traffic
Rigid core flooring (RCF) construction for dimensional stability
Click-lock system allows for easy-to-install flooring
Designed for both residential and commercial use
Attractive finishes mimic real hardwood with added durability
These features make Cortona Maxx a prime example of modern flooring solutions that don’t compromise on performance or visual appeal.

Tools & Materials Checklist
Before beginning your vinyl plank floor installation, ensure you have the following tools on hand:
Tape measure
Utility knife
Spacers
Tapping block
Rubber mallet
Speed square
Pull bar
Level
Moisture barrier (if installing over concrete or below-grade)
Transition moldings (as needed)


Step 1: Acclimate the Flooring
Allow the Cortona Maxx waterproof floors to acclimate in the room where they’ll be installed. The planks should remain in their boxes, laid flat, and stored in the installation area for at least 48 hours.
Best Practice: Maintain a room temperature between 65°F and 85°F and a relative humidity of 35%–75% during acclimation and installation.
Step 2: Prepare the Subfloor
Cortona Maxx is a rigid core flooring system and can be installed over most existing surfaces, including tile, vinyl, or wood. However, subfloors must be:
Clean: Remove dust, debris, and adhesives
Dry: Moisture levels should comply with manufacturer guidelines
Level: No more than a 3/16-inch variation over a 10-foot span
Note: For installations over concrete, a moisture barrier is recommended to protect against vapor transmission.
Step 3: Plan Your Layout
Start by identifying the longest wall in the room or the wall that is most visually prominent. Measure the room to determine plank layout, accounting for expansion gaps (usually 1/4 inch) around all walls and vertical obstructions.
Tip: Avoid ending rows with planks shorter than 8 inches. You may need to trim the first plank to allow for a more consistent staggered pattern throughout the room.
Step 4: Begin Installation
Start in the left-hand corner of the room with the tongue side of the plank facing the wall. Use spacers to maintain the proper expansion gap.
Lay the first plank flat on the subfloor.
Connect the next plank by inserting the tongue into the groove at an angle and lowering it until it clicks into place.
Use a tapping block and mallet as needed to ensure tight joints.
Stagger the seams of adjoining rows by at least 6 inches for a natural appearance and structural integrity.
Continue across the room, cutting the final plank in each row to fit as needed. Use a pull bar to secure end planks tightly.
Step 5: Trim and Finish
Once the planks are fully installed:
Remove the spacers
Install transition moldings between different flooring types or room thresholds
Reinstall or add baseboards or quarter-round molding to cover expansion gaps
Avoid walking on the floor or replacing furniture for 24 hours to allow for settling
Don’t wait!
Contact us now to schedule your consultation and discover how El Dorado Hills Floor Design can transform your floors into the stunning foundation of your dream space!
Post-Installation Care
To maintain the integrity of your Cortona Maxx waterproof flooring, follow these care tips:
Sweep or vacuum regularly (without a beater bar) to remove dirt and debris
Clean with a damp mop using manufacturer-approved cleaners
Use felt pads under furniture to avoid scratching
Avoid steam mops and harsh chemical cleaners
Place rugs at entryways to minimize tracked-in moisture and grit
Thanks to its resilient surface, Cortona Maxx requires minimal maintenance while standing up to everyday wear and tear.
Conclusion: Long-Lasting Performance with Style
Installing Cortona Maxx waterproof floors is a worthwhile investment in the beauty, functionality, and longevity of your living space. With its pet-friendly, scratch-resistant, and water-resistant vinyl features, this premium vinyl plank system is well-suited for virtually any environment — from busy households to modern commercial interiors.
By following these step-by-step best practices and manufacturer guidelines, you’ll ensure your new plank flooring not only looks fantastic but performs exceptionally for years to come.
📣 Call to Action:
Planning a flooring upgrade? Choose Cortona Maxx waterproof floors for a combination of elegance, durability, and ease of installation. It’s a smart, stylish foundation for any room.